I love this Faux Metal technique. I have a bunch of ideas I'd love to use this technique out on. Now, whether or not I end up with time or not to try out my ideas, well... I'll just have to see how it goes.
This was one of the cards we made last month for my Faux Metal Class. The Spice Cake DSP lends itself to metal accents...what a fun set of paper it is to play with. If you'd like to make this card yourself here's the link to my FREE tutorial. Have fun with it!
Showing posts with label faux metal. Show all posts
Showing posts with label faux metal. Show all posts
Tuesday, November 8, 2011
Saturday, October 29, 2011
Scalloped Faux Metal Gratitude
This is the last card we made in my Fall-Themed class this month. This features the MDS digital medallion stamp from Day of Gratitude, so I guess it qualifies as a hybrid card.We used water coloring to color in the medallion and we made our own Faux Metal textured metal paper for the background paper and button. This was a lot of fun to create and share with all of my stamping gals. They all did such a great job!
- Here's a mini tutorial for the Faux Metal technique:
 |
| Supplies: Aluminum Foil, cardstock, glue stick, textured impression folder |
 |
| Use glue stick to glue aluminum foil to cardstock. Apply glue stick liberally. |
 |
| Cut out your Faux Metal shape of choice using a punch or by placing your foil/cardstock piece face down on the Big Shot die. I chose the Scallops #2 die, large scallop. |
Thanks for stopping by!
Supplies:Cardstock: Whisper White, Early Espresso
DSP: Spice Cake
Ink: Early Espresso; Reinkers - More Mustard, Pool Party
Punches: 2-1/2" Circle
Big Shot: Scallop Circle, Scallop Circle #2 Bigz die, Square Latticke folders
Stamp Set: MDS Day of Gratitude, Teeny Tiny WishesFriday, September 5, 2008
Handbag Challenge #5

From Adriel:
It's Friday again and that means the deadline for Handbag Challenge #5 on Theresa Forseth's blog is fast approaching. My entry this week is 4 little 3x3 cards and special "bag" to hold them in. I found a wonderful tutorial for an envelope book here. I used the same concept and designed my own "envelope" that would hold 3x3 cards and envies. I decorated the front of the card holder to match the purse as best I could. The colors I used for this "handbag" were Blush Blossom, Pink Piroutte, Summer Sun, Real Red, Whisper White, and Basic Black (SU! colors).

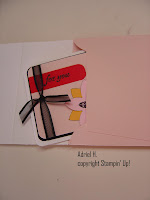
The bag opens to hold 4 matching 3x3 cards and envelopes. You can see how it opens below.

I tried a new technique with this project... faux metal. The silver accent on the front of the bag is actually 3 layers of silver embossing powder imprinted with a stamp. So cool! I was stumped on the zipper, so I consulted my mom (who sews very well BTW). She got out a zipper and rubbed ink on it and rubbed that on paper. It seemed promising, so we rubbed Versamark on the zipper, rubbed on the CS, then applied the silver embossing powder which was then heat embossed. It worked great!

The card is a 3x3 card with the same colors used on the purse. I used the Fresh Cuts set for the saying and and the flower in the middle of the flower. I used my 5-petal punch for the embellishment and some nice, sheer, black ribbon. It would make a cute gift for someone, I think.


The bag was the most difficult part of the project. It took a lot of planning and working, along with re-working. I've been working on it a little here and a lot there over the past 3 days! It was worth it and I enjoyed what I learned. It really looks so much nicer in person, but I've posted several pictures to give you some good views. Thanks for looking and enjoy your weekend! Don't forget to go to Theresa's blog on Saturday and Sunday to vote for your favorite entry!
Subscribe to:
Posts (Atom)


